July 4th Crispy Rice Crackers Red, White and Blue!
July 4th Crispy Rice Crackers Red, White and Blue!
Delicious, simple, and quick July 4th Crispy Rice Crackers are always popular and suitable for any patriotic occasion.
The red, white and blue July 4th Crispy Rice Cake is a classic no-bake dessert, it’s fun to eat! When I need to keep the kitchen cool, I also like to make butterscotch corn chip cookies or no-bake strawberry shortcakes.
Red, White and Blue Rice Shortbread
Whenever I need to make a last-minute treat, I always choose rice crackers because A) I always have the ingredients on hand and B) They are simple and delicious! !
With the approach of summer and patriotic holidays, I want to give you a quick, simple and festive treat, allowing you to participate in all barbecues, parties and gatherings!
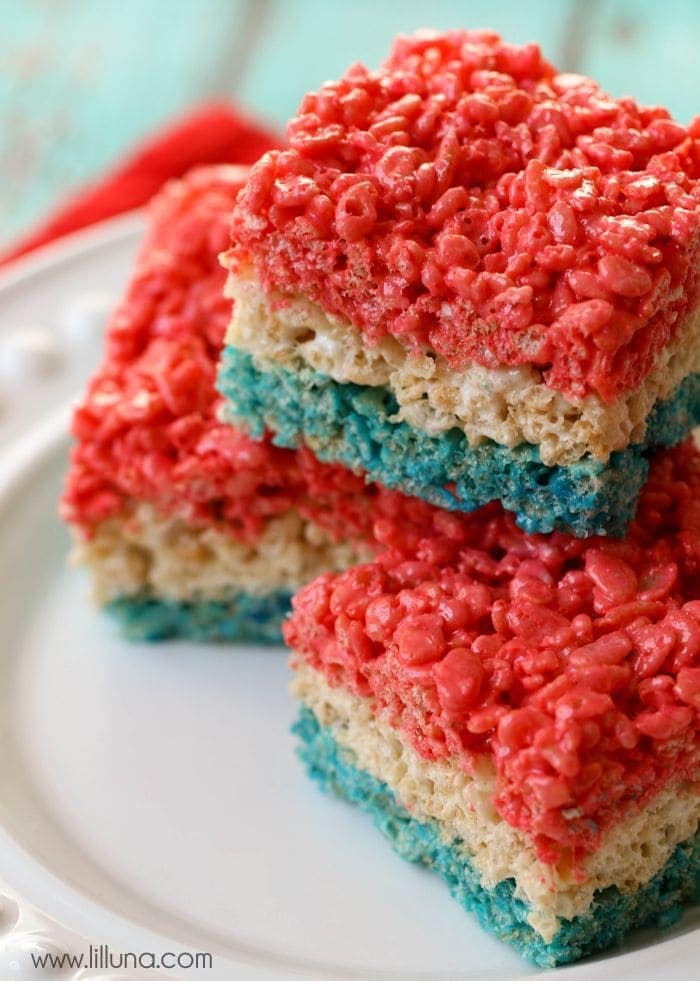
I used some red and blue food coloring to create these patriotic layers, and I love the results of these July 4th rice crackers! This is just a little extra effort, but the extra few minutes are worth it. How simple they are to make, they look very impressive! You really can’t go wrong with rice crackers.
Making July 4 rice shortbread
Prepare. Divide your cereal and marshmallows into three portions (2 cups of rice crackers and about 2 cups of marshmallows). You will make one layer at a time.
Marshmallow. Put marshmallows in a microwave-safe bowl and add 1 tablespoon of margarine to each bowl. Heat in the microwave for a few minutes at a time, until the marshmallows begin to expand. Make sure they don’t overflow!
dye. In one bowl, add blue food coloring, and mix red in another bowl (food coloring gel will be more vibrant). Add 2 cups of rice crackers to each bowl and stir with a rubber spatula until all the oatmeal is coated.
gather. Place the cereal in the glass baking dish in any order you like (we start with blue, white, then red). To evenly flatten the layer, you can use a piece of wax paper on the marshmallow-covered grain and press it with your hands. This way your hands will not become so messy and the rice crackers will not stick to you.
Cool. Let all layers cool before cutting into squares. enjoy!
Variety
- Mini marshmallows: Use normal size or Mini marshmallows As long as you have the amount required by the recipe in each individual bowl.
- coconut oil: Replace with equal amount of butter coconut oil But it will add a touch of coconut to your rice crackers.
- The size of the pot: I use 8×8 or 9×9 glass plate. You can use 9×13, but snacks will be thinner. You can also double the recipe and use a 9×13 pan to make thicker rice crackers.
- shape: Once the layer has cooled, once the layer has cooled down, use a cookie cutter Cut out different shapes. I think the stars will be interesting on July 4th!
Tips + storage information
In order to cook marshmallows, I prefer to use the microwave to heat the marshmallows, but if you prefer to use the stove, anyway, you can! I still recommend making three layers separately so you can ensure that each layer has the same amount of marshmallow coating.
Don’t cut the rice crackers hot. Once they are completely cooled, it is much easier to cut. This will help you get the perfect square or shape you need without separating them.
Don’t use old marshmallows. The old marshmallows began to dry out and hardened on the outside, they did not melt well. Fresh marshmallows will become soft and sticky when they melt, and they will become a large piece, but even if they look good, they will become very hard once cooled.
To prevent your snacks from becoming too hard:
- Only use fresh marshmallows.
- Don’t pack them too tightly. You should not hear the crunch of the grains. This will not only make them rock solid, but it will also be difficult to remove them from the pot.
- Don’t cook the marshmallows for too long. If you see butter or marshmallows starting to burn or brown, then you have been cooking too long.
If it happens that your snacks are hard, you can try placing them in the microwave for a few seconds to soften them. They will be more chewy than freshly made, but still delicious. I must add a word of warning: eat them before they harden again, or you may break your teeth!
Suggestions so as not to insist on:
- One of the best ways to keep them from sticking to your hands is to tear off a small piece of wax paper and place it under your fingers while pressing them into the pot. If wax paper is not an option, you can put your hands in cold water or rub a little butter on your fingertips before then.
- Lubricating the pan first with butter or non-stick spray will help them stick. The same thing can be done with mixing spoons and cutting knives.
Shop In an airtight container, it can only be stored for about 2-3 days. Try to store them in a container that fits all these containers without too much air. The more open space, the more likely they are to dry out. Store them at room temperature instead of in the refrigerator. Sticking a piece of sandwich bread in the container will help keep the crispy rice crackers soft.
I hope you enjoy this easy July 4th dessert as much as my family!
For more patriotic cuisine, please check:
Course dessert
American cuisine
Preparation time 8 minutes
Cooking time 2 minutes
Total time 10 minutes
12 servings
Calories 198 kcal
Author Little Luna
- 6 cups rice crisp oatmeal (divided)
- 16 ounces of marshmallows (divided)
- 3 tablespoons of margarine or butter (divided)
- Food coloring (red and blue/turquoise-I like Betty Crocker Gel food coloring because the color is brighter)
-
Collect your supplies and divide the rice crackers and marshmallows into three layers (2 cups of rice crackers and about 2 cups of marshmallows).
-
Put marshmallows and margarine (1 TB) in a microwave safe bowl for a few minutes, or until they start to grow larger and almost touch the top of the microwave. Take out, stir well, and add food coloring. (We start with blue, then no food coloring, then red).
-
Then add 2 cups of rice crackers and mix well. Press into a greased 9×9 pan (9×13 can be used, but thinner food can be made).
-
Repeat without using food coloring, and then use a red food coloring layer. Let’s start enjoying!
The page you are looking for does not exist (404)