How to Make the Perfect Caramel Apple +video
How to Make the Perfect Caramel Apple +video
Making delicious caramel apples is easier than you think! With these tips and tricks, you’ll be eating beautiful (and delicious) homemade caramel apples in no time.
I know caramel apples are a particularly popular dessert in the fall, but I crave caramel apples all year round! I love the flavor so much, I have a dump cake, a fudge, and a dip that’s all caramel apple flavor!
Favorite Family Treat
I love (like super love) caramel apples!
They are my heaven on earth! They’re pretty much a “must buy” item every time we go to places like Disneyland or on vacation (our all-time favorite is the apple pie caramel apple!). We usually buy one to slice and share with the whole family, and I’m happy to say that my love for caramel apples has officially passed on to the kids.
Of course, when they asked for caramel apples for family night dessert last week, I couldn’t say no. I’ve made many in the past but never liked how they turned out. I’ve done a lot of research and practice and now come up with some great tips for the perfect caramel apple.
How to Make Caramel Apples
Prepare apples. First wash your apples and let them dry completely. This will help remove the wax from the apple peel and allow the caramel to adhere better.
notes: I bought some smaller golden gourmet apples from Walmart because the big ones are overwhelming (unless you slice them thinly). They are the perfect size for the kids (and me) and they work great!
Add sticks. Remove your stems and add your skewers or suckers.
Note: Wilton has some great patterned lollipop bars, I’ve seen them at my local Walmart and Kroger/Frye. They’re fun, sturdy, and totally doable. I got mine stuck by about an inch or two. If you can’t find them at your local store, I also found sticks on Amazon in different colors.
refrigeration. I put the apples on a parchment lined cookie sheet and refrigerated for a few hours. This is my first time doing this and I’m so glad I did. Refrigerating them will help the caramel cool faster and run less. Works like a charm!
caramel. You can’t go wrong with Brach’s Milk Maid Caramels. Unpack the caramels, put them in a saucepan with water, and melt them over low heat, stirring them all the time. I do this because I don’t have a double boiler, but if you have one, you can use that too!
notes: Even though I have a lot of apples, I melt the caramel one bag at a time because I want to make sure it works and the caramel stays hot the whole time. It started to cool after a while, so I’m glad I only make one bag at a time.
coat. Dip your cold apples in the melted caramel and twist to coat the apples on all sides. Let excess caramel drip off, then place back on pan with parchment paper. Put in the refrigerator to let the caramel set.
optional toppings
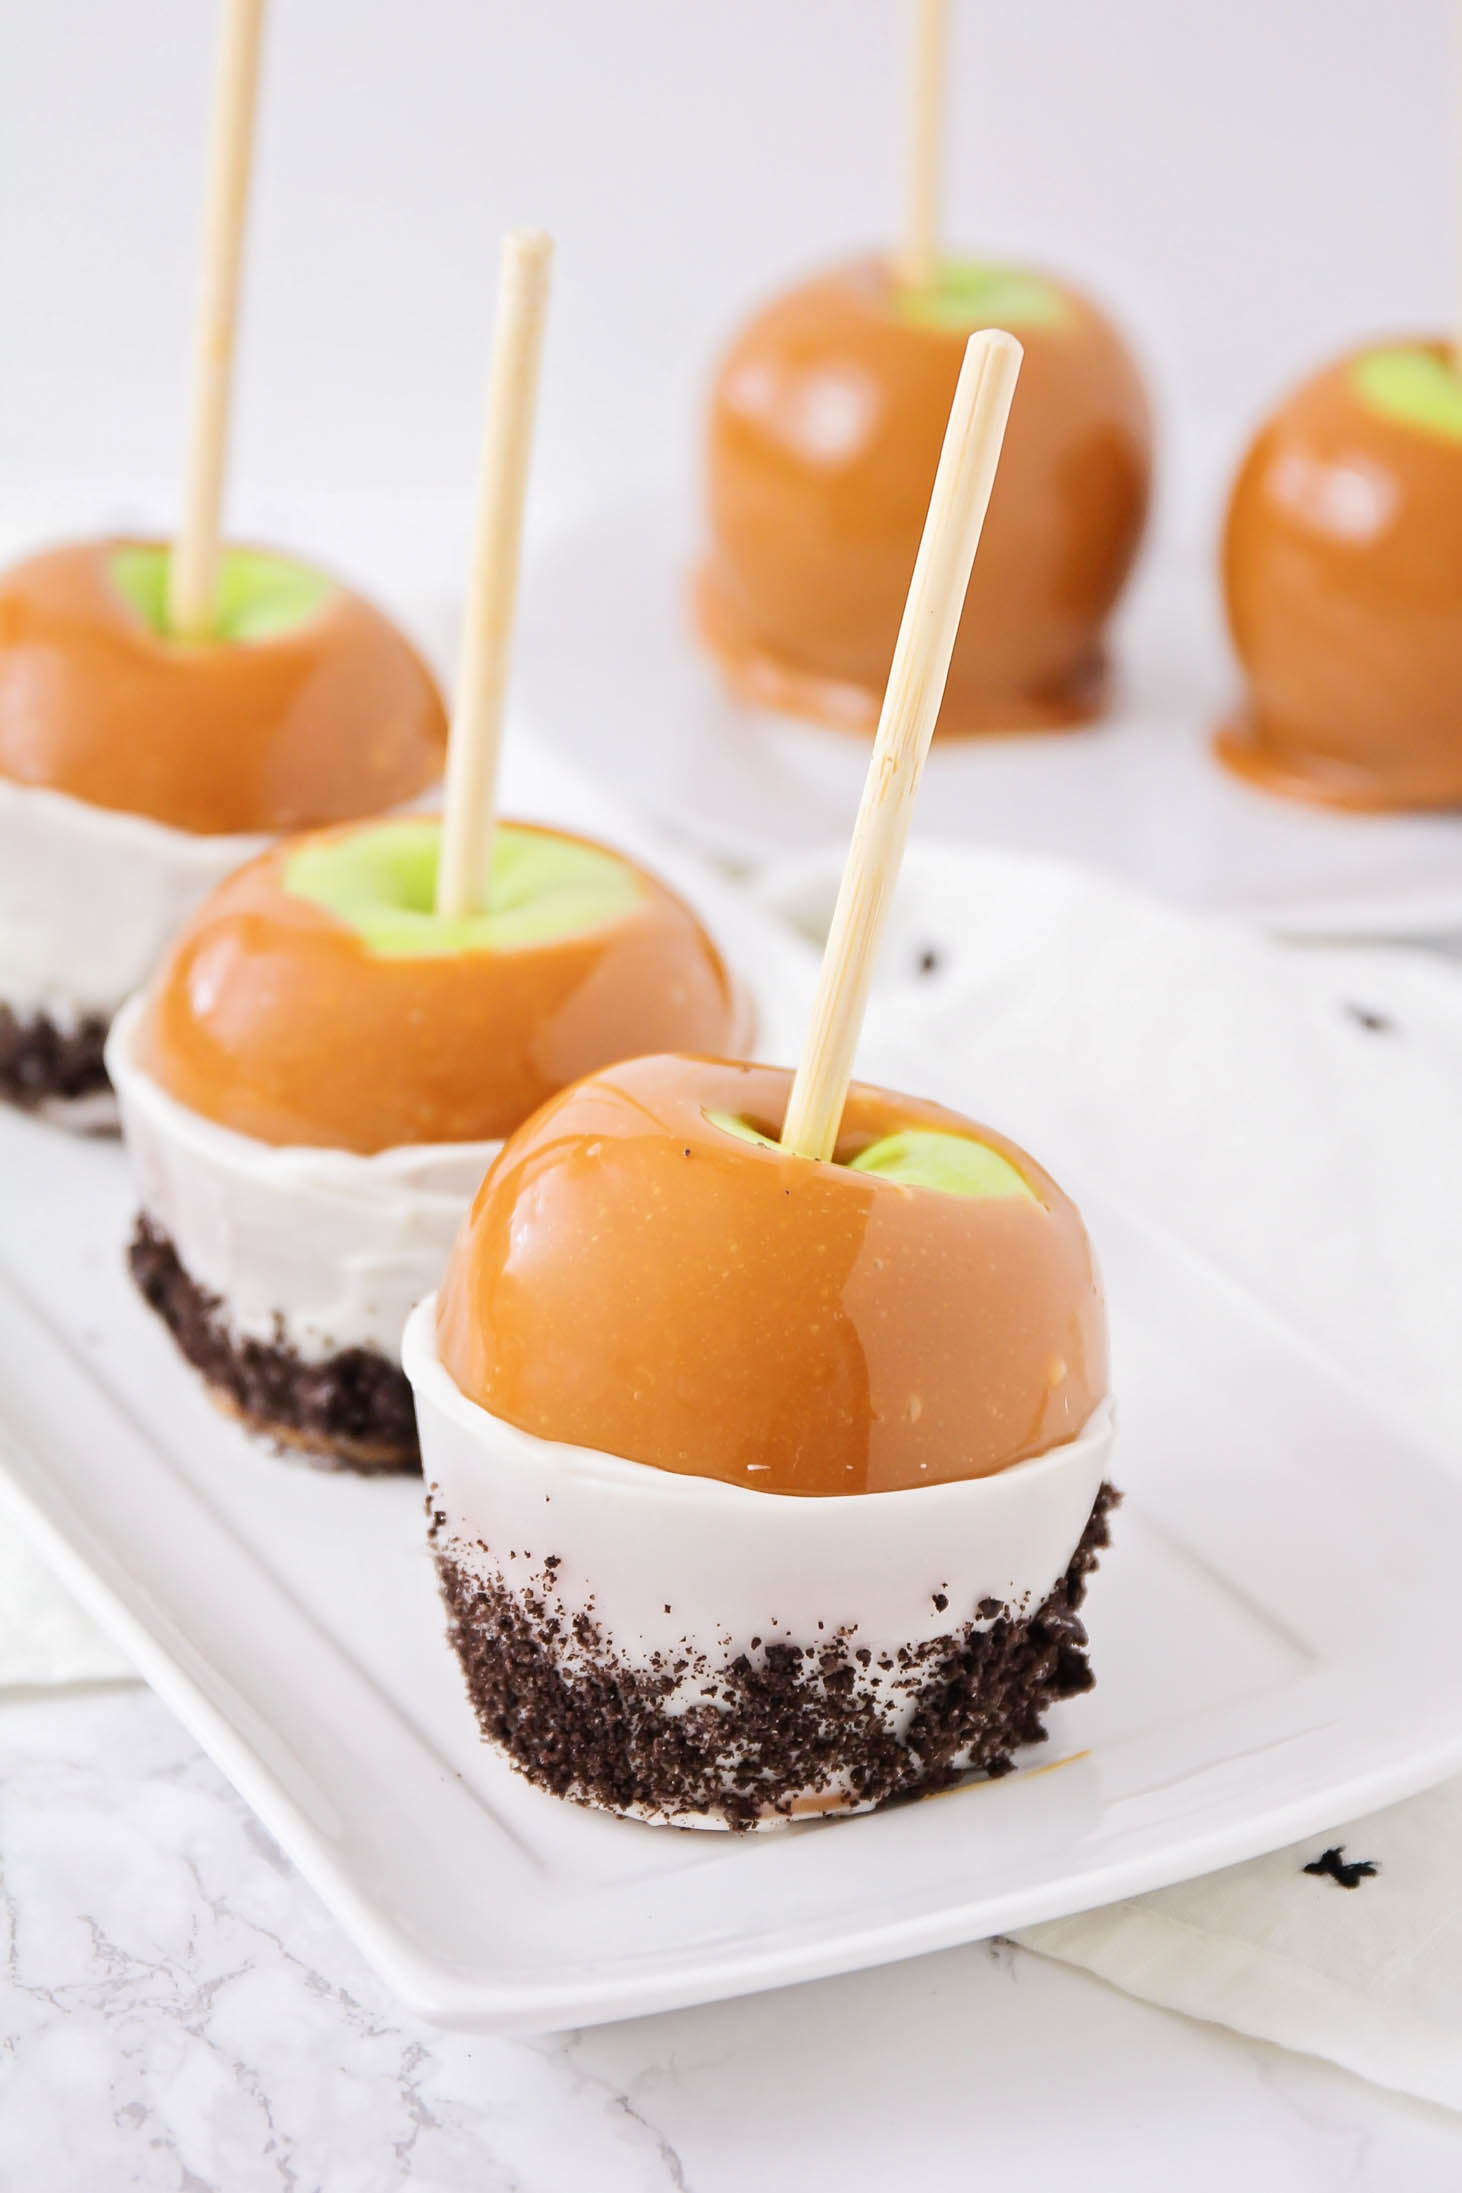
After the caramel has set, you can add some optional candy coatings and toppings. Dip in melted chocolate/candy coating, then dip with your toppings. Put them back in the refrigerator to set. Make sure to take them out 30 minutes before serving so they’re just the right temperature to eat!
Some important ideas:
- light rain
- chopped nuts
- Mini m&m’s, mini Reeses, mini chocolate chips or mini marshmallows
- Shredded coconut
- Crushed Cinnamon Toast, Graham Crackers, Butter Fingers, Pretzels, Oreos
- candy corn
Frequently Asked Questions
What apples are best for caramel apples? This is entirely up to your preference. Whether you prefer tart or sweet, make sure the apples you choose are firm and free of bruises. The following guides can help you choose an apple you might like:
- Sweet: Gala, Fuji, Honeysuckle, Emperor, Jinxiang,
- Modest Pies: Mackintosh, Paula Reid, The Magnificent, Roman Beauty
- Tarts: Granny Smith, cortland, melrose, winesap
- Sweet and Sour: Jazz, Pink Lady, Jonagold
How do I keep the caramel on the apples? If you can’t keep the caramel on the apples, try the following:
- Keep the caramel hot enough to melt together, but not so hot that it will slide off immediately.
- After washing the wax off the apple, sand the skin with fine sandpaper, but don’t break the skin. This will leave “grooves” for the caramel.
- Make sure the apples are cold and dry.
What should I do with “caramel feet”? After dipping the apple in caramel and placing it in the refrigerator, you may notice some of the caramel slips off and settles on the bottom of the apple, creating a “caramel foot.” To get rid of this, trim off the larger sections, then use your fingers to gently smooth out the remaining caramel.
Storing Your Caramel Apples
- Countertop: Apples that are not pierced with a stick will keep for about 7 days at room temperature.
- Refrigerator: Apples with sticks should be kept in the refrigerator for up to 2 weeks. Use a container that allows air circulation. Sliced apples can be kept in an airtight container. Treat apple slices with lemon juice or use a fresh fruit protectant available at the grocery store to keep them from browning.
- Freezing caramel apples is not recommended.
I’m happy to say that these apples were eaten so quickly and happily! You can obviously modify it to your liking (no chocolate, different sweets, etc). My kids are already asking for them again and I can’t wait to get them to do more this fall.
For more caramel apple recipes, check out:
Course dessert
American food
Prep time 10 minutes
Refrigeration time 1 hour 20 minutes
Total time 1 hour 30 minutes
Serving Size 6
Calories 275 kcal
by Lil’ Luna
- 6 apples see note
- 10 oz bag BRACH’S Milk Maid Caramel
- 3 tablespoons water
- White chocolate candy coating optional
- Crushed sugar cubes/topping optional
-
First wash your apples and let them dry completely. This will help remove the wax from the apple peel and allow the caramel to stick to it better.
-
Remove your stems and add your skewers or lollipop sticks. I got mine stuck by about an inch or two.
-
Place apples on a parchment lined baking sheet and refrigerate for 1-2 hours.
-
Unpack the caramel and mix them with the water on the stove over low heat, stirring them all the time. (Double boilers work well if you have them.)
-
Dip cold apples in melted caramel and place back on parchment paper. Refrigerate again.
-
After the caramel sets, you can enjoy the apples as they are, or you can dip in extra candy coating and crushed toppings/sprinkles!
-
Refrigerate your apples until you are ready to serve. Remove from refrigerator at least 30 minutes before serving.
I used some of the smaller golden savory apples because for me the big ones just don’t fit in one sitting (unless you slice them thinly). I can cover 6-7 small apples with a bag of caramel. If they were bigger, I might only be able to do 4-5. If you’re making more than 6 apples, I recommend melting only one bag of caramel at a time. Otherwise, the caramel will cool during the dipping process and won’t go as smoothly as the apples.