Peanut Butter Cookie Bars with Buttercream Frosting
Peanut Butter Cookie Bars with Buttercream Frosting
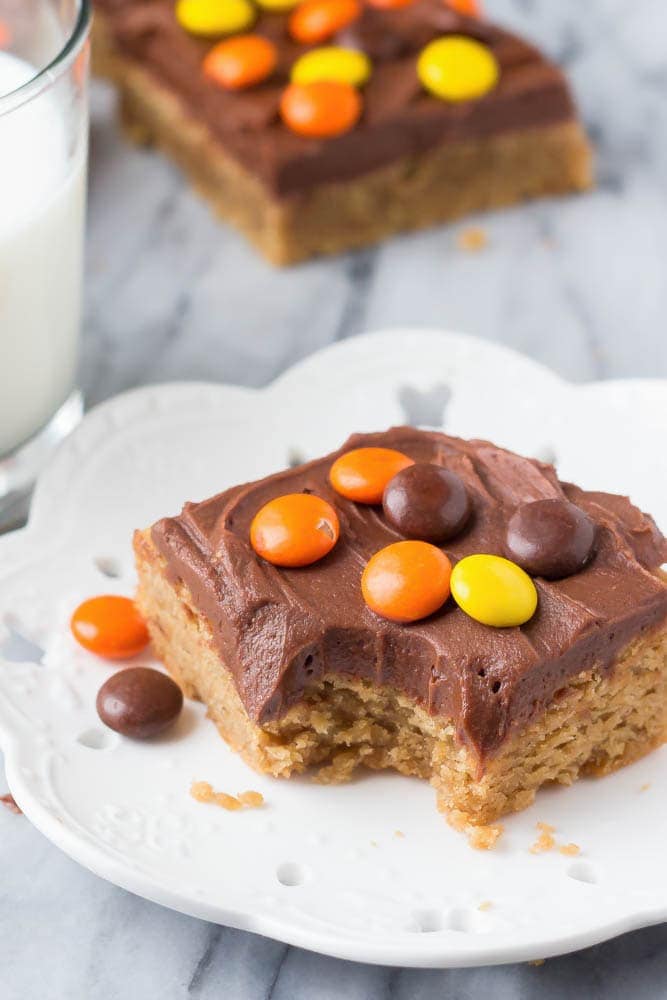
Chocolate Peanut Butter Cookie Bars start with a layer of super soft and chewy peanut butter cookies topped with a creamy milk chocolate frosting.
These are like classic peanut butter cookies in bar dessert form. Our favorite chocolate cream is also a delicious topping for these cookie bars!
Peanut Butter + Chocolate Chip Cookie Bars
Hello! My name is Fiona, nice to meet you! I blog on Just So Tasty and today is my first post on Lil’ Luna.
I love baking desserts, and anything with peanut butter – especially peanut butter and chocolate. So, I thought it only made sense to share my favorite Chocolate Peanut Butter Cookie Bars.
These cookie bars start with a layer of soft and chewy peanut butter cookies. They were then frosted with a creamy milk chocolate frosting and decorated with pieces of Reese.
Chocolate frosting makes them extra special than regular peanut butter cookies. And because we made them into bars, it was less work because we didn’t have to roll the dough into balls.
How to Make Peanut Butter Cookie Bars
Prepare. Preheat oven to 350 degrees. Line an 8×8-inch square baking pan with aluminum foil and grease with nonstick cooking spray. shelved.
dough. In a medium bowl, beat butter, sugar, and peanut butter with an electric mixer on medium speed until smooth. Add eggs and vanilla and continue beating until combined (about 30 seconds).
Turn the mixer to low speed and carefully add the flour, cornstarch, and baking powder. You may need to turn off the mixer and scrape down the sides of the bowl.
bake. Spoon the batter into the prepared pan and press to the edges with your hands or a rubber spatula. Bake in the preheated oven for 20-23 minutes, or until the top is set and the edges are starting to brown and pull away from the sides of the pan. Let cool completely before frosting.
frost. Make frosting in a medium bowl with an electric mixer on medium speed. You can adjust the amount of confectioners’ sugar or whipped cream to achieve the desired consistency.
(notes: I like to use whipped cream in the frosting as it makes it extra creamy and smooth. but if you only have milk On hand, it also works. )
Decorate. To decorate the strips, first remove them from the pan using aluminum foil. Frost with chocolate buttercream with a flat-edged knife. Then decorate with Reese’s Piece. Cut into 9-12 strips and serve.
change + addition
It’s worth mentioning when these bars are best baked regular peanut butter used to. The natural or whipped ones aren’t great either. However, if you like a little texture, you can use regular crunchy peanut butter.
These Peanut Butter Bars are delicious, but it can be fun change the status quo Every now and then. Here are some suggestions you might want to try:
- Press mini Reese cups into top of dough before baking
- Mix mini chocolate chips with dough
- Use crunchy peanut butter or top with chopped nuts
lead and store
These peanut butter cookie bars are best eaten the right way. If you happen to have leftovers, they can saved Up to 4 days in an airtight container.
if you want make them advancethen I recommend whipping and freezing the dough into dough form.
Shape the dough into a ball or log. Wrap tightly in plastic wrap, then in foil. Label and freeze for up to a month. Thaw in the refrigerator, then place in a baking sheet and bake as directed.
Chocolate frosting can also be frozen in an airtight container. Thaw before use.
For more chocolate + peanut butter treats, check out:
Course dessert
American food
Prep time 10 minutes
Cook Time 20 minutes
Total time 30 minutes
Serves 12 bars
Calories 287 kcal
by Lil’ Luna
Peanut Butter Cookie Layer
- 1/3 cup unsalted butter softened to room temperature
- 2/3 cup light brown sugar packed
- 1/3 cup non-natural or whipped peanut butter
- 1 1/2 teaspoons vanilla
- 1 large egg
- 1 cup all-purpose flour
- 2 teaspoons cornstarch
- 1/2 teaspoon baking powder
Milk Chocolate Frosting
- 1/3 cup unsalted butter softened to room temperature
- 1 1/4 cups sifted powdered sugar
- 3 tablespoons natural cocoa powder sifted
- 1 teaspoon vanilla
- pinch of salt
- 2-3 tablespoons whipped cream
-
Preheat oven to 350 degrees Fahrenheit. Line an 8×8-inch square baking pan with aluminum foil and grease with nonstick cooking spray. shelved.
-
In a medium bowl, beat butter, sugar, and peanut butter with an electric mixer on medium speed until smooth and no butter or sugar lumps remain. Add eggs and vanilla and continue beating until combined (about 30 seconds).
-
Turn the mixer to low speed and carefully add the flour, cornstarch, and baking powder. You may need to turn off the mixer and scrape down the sides of the bowl.
-
Spoon the batter into the prepared pan and press to the edges with your hands or a rubber spatula. Bake in the preheated oven for 20-23 minutes, or until the top is set and the edges are starting to brown and pull away from the sides of the pan. Let cool completely before frosting.
-
To make the frosting, in a medium bowl, beat the butter with an electric mixer on medium speed until soft. Turn mixer to low speed and add sugar about ½ grain at a time. After each addition, set the mixer to medium-high speed for 5 seconds. Then with the mixer on low speed, add the cocoa, vanilla and salt. Finally, add the whipped cream 1 tablespoon at a time until desired consistency and sweetness are achieved.
-
To decorate the strips, first remove them from the pan using aluminum foil. Frost with chocolate buttercream with a flat-edged knife. Then decorate with Reese’s Piece. Cut into 9-12 strips and serve.
*Bars can be stored in an airtight container for up to 4 days at room temperature.
________________________
I am totally convinced that chocolate and peanut butter are the ultimate combo! These cookie bars look amazing! Thanks for sharing this recipe with us, Fiona. For more great recipes, visit Just So Tasty!
For all dessert recipes click here.
For all recipes click here.