Hot Cocoa Cheesecake Mini Lovely Holiday Treat
Hot Cocoa Cheesecake Mini Lovely Holiday Treat
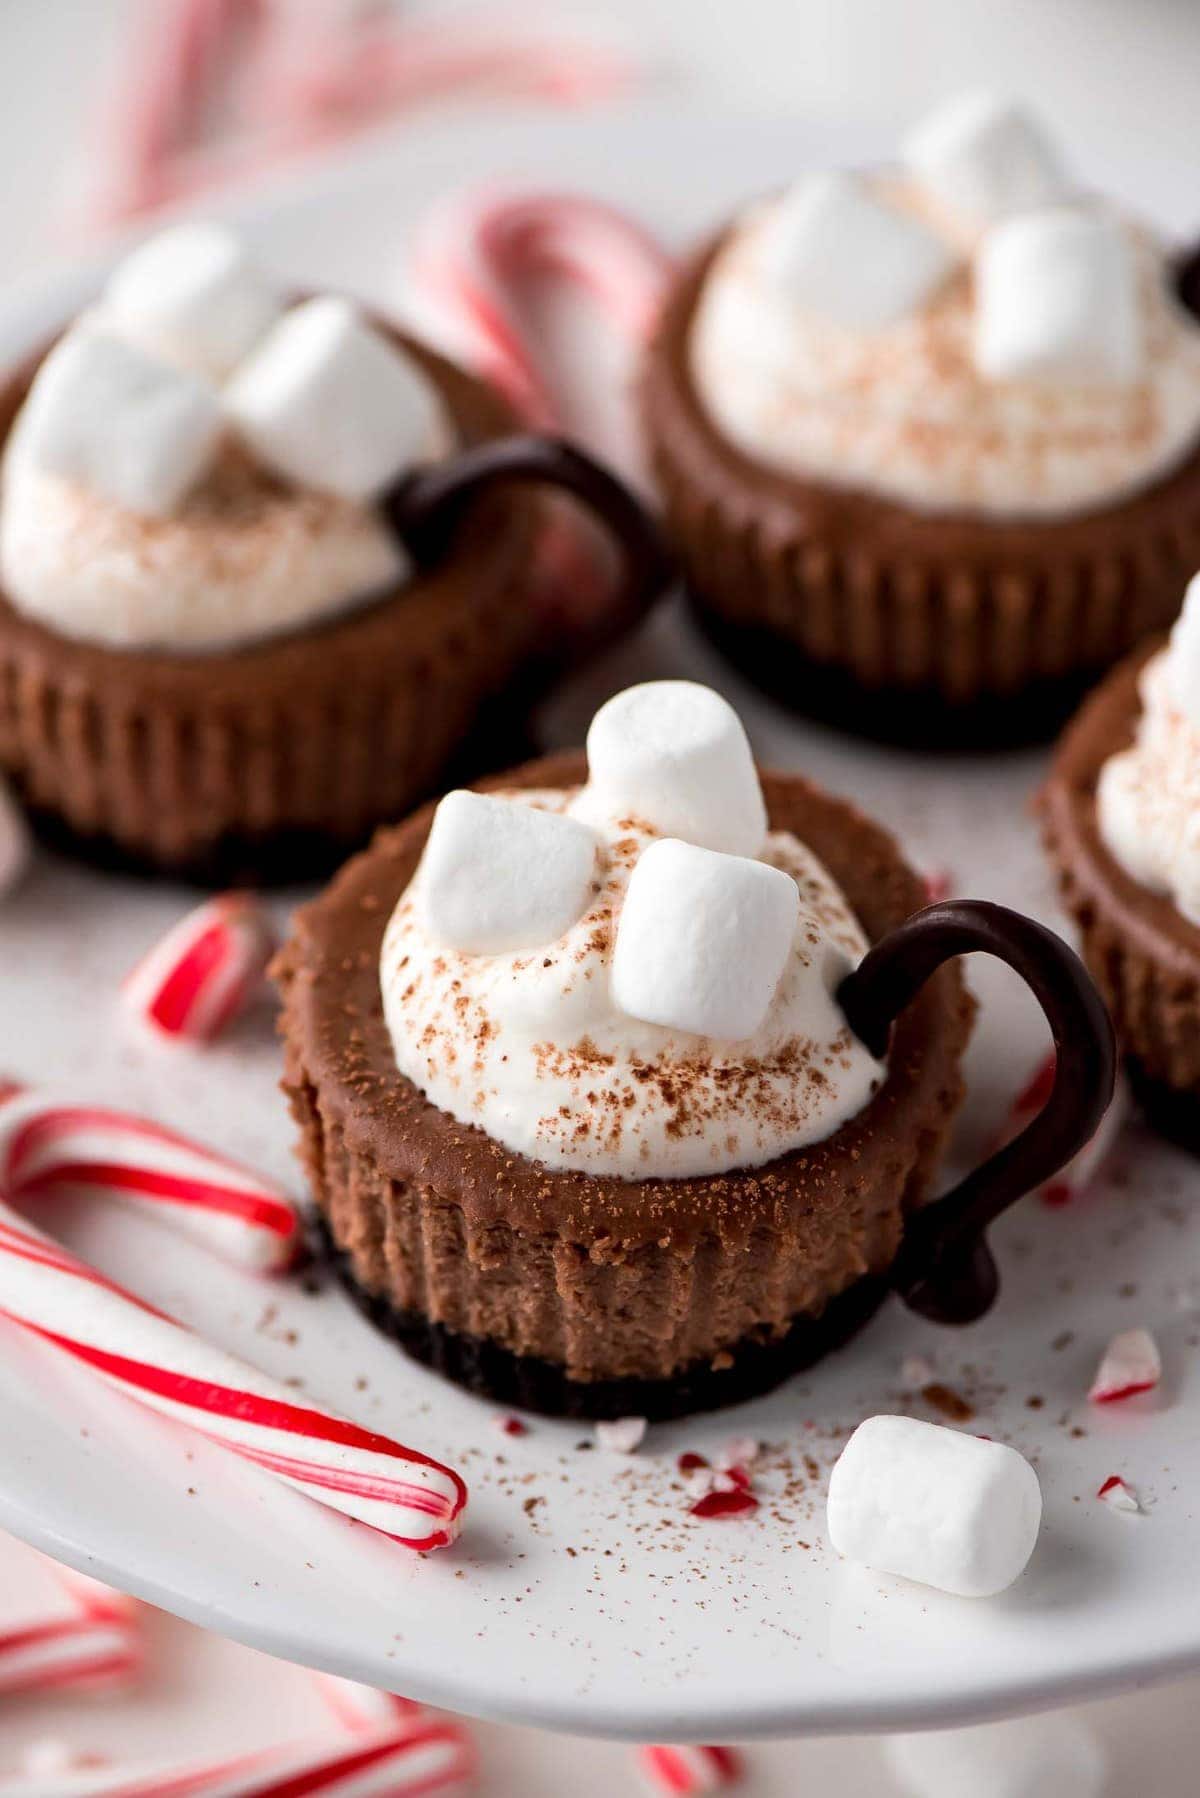
These mini hot cocoa cheesecakes are the cutest and most delicious way to enjoy winter and spread Christmas joy.
No one can pass these mini hot cocoa cheesecakes at your holiday party! Try delicious gingerbread, Christmas tree brownies and frozen hot chocolate to get more edible Christmas candies!
Cutest holiday cheesecake
If there is one dessert I can’t miss, it is cheesecake!
It is rich, creamy, and smooth, but still has the texture of a crust. Moreover, the toppings and flavor combinations are endless. Today, I want to share the cutest mini hot cocoa cheesecake.
Making a giant cheesecake seems overwhelming because of how long it takes and how many people it takes to finish it.
I like the mini cheesecake because it is ready in less than 4 hours. You can eat cheesecake without waiting overnight! In addition, they have allocated services perfectly.
These little guys only need 22 minutes to bake and then cool/cool for 2-3 hours. Yes, you can make cheesecake at noon and eat it before dinner.
But first you have to put homemade whipped cream, a little cocoa powder, crushed sugar cane, some marshmallows and a small chocolate handle on these babies.
How to make hot cocoa cheesecake mini
Prepare. Heat the oven to 325°F.
Crispy. Pulse Oreos in a food processor until you have a crumb texture. Mix biscuit crumbs and butter; press on the bottom of 12 paper-lined regular-size muffin cups. Bake for 8 minutes.
filling. Put the cream cheese, ½ cup of sugar, and ¼ cup of cocoa powder in a medium bowl with a blender, and stir until combined. Add eggs, 1 at a time, stirring at low speed after each egg until combined. Cover the crust with a spoon.
tip. To get a smooth, properly fermented cheesecake, first soften the Philadelphia cream cheese (microwave at 50% power until it becomes soft in the middle), beat until smooth and no lumps, and then add eggs one at a time until fully integrated (don’t overdo it) ).
Baking + cooling. Bake for 22-25 minutes. Or until the center is almost set. Cool completely. Refrigerate for 2 hours.
Chocolate handle. At the same time, make the chocolate handle. Cover the baking sheet with parchment paper. Melt the semi-sweet chocolate according to the instructions on the package, then use a spoon to put it in a resealable plastic bag. Cut a small piece from one bottom corner of the bag. Squeeze the chocolate into 12 handle shapes on the prepared baking sheet. Freeze until ready to use.
Decorate. Remove the paper liner from the cheesecake. Use a whisk in a separate medium bowl to whisk the cream and remaining sugar at high speed until soft peaks form; scoop onto the cheesecake. Sprinkle with remaining cocoa powder; marshmallows on top (we even added crushed candy canes to add flavor). Gently press the chocolate handle into the side of each cheesecake.
Recipe notes
- Cream cheese: When making cheesecake, it is important to use high-quality cream cheese-PHILADELPHIA Cream Cheese. It is very smooth, creamy, and holds well.
- cocoa: This recipe is made with cocoa powder. Make sure you don’t accidentally use hot cocoa mixture. It will completely change the overall taste of cheesecake.
- cream: To make the cheesecake creamy, you need to use room temperature cream cheese and eggs, and avoid over-mixing the ingredients.
- Oreo: When crushing Oreos, there is no need to scrape off the center of the cream. The cream is chopped together with the biscuits. You can’t see it, but it helps to sweeten the shell and helps it maintain its shape.
- handle: Another idea is to use mini candy canes instead of making chocolate handles yourself.
- liner: Use silicone cake lining. The cheesecake can not only slide out directly, but also can be reused.
Recipe tips + changes
handle: You need to make sure that the size and shape of the handle are the same. When paired with cheesecake, they also need to be proportional. Many people are good at observing it, but others need a little help.
- Use a black permanent marker to draw 12 identical handles on the parchment paper.
- Turn the paper over. You should be able to see the mark through the paper.
- Squeeze the chocolate directly on the marker.
- You need to adjust the amount of semi-sweet chocolate according to the size and shape of the handle. It’s always a good idea to have some extras on hand in case you need it.
No baking version: I haven’t tried the no-bake recipe to make this dish. I am worried that they will not maintain their shape as required by this recipe. Mini cakes need to be very firm, and I think this can be better achieved with baked cheesecake recipes. Thankfully, they only need 22 minutes to bake, and you don’t need any professional pan or water bath.
Make them more mini: This recipe is a mini cheesecake, but you can use the mini muffin pan to make them more mini. You will get a larger output, and the baking time must be shortened, otherwise the instructions are the same.
Store information
Make the chocolate handle and cheesecake in advance, But I don’t recommend making whipped cream in advance because it may fall off and it won’t be as breathable as you need.
Shop Mini cheesecakes in the refrigerator. It is best placed in a sealed Tupperware container with a lid. They will last about a week.
freeze It can be stored for up to 6 months in an airtight container. Separate the layers with parchment paper.
For more personalized cheesecake recipes, please try:
Course dessert
American cuisine
Preparation time 3 hours 20 minutes
Cooking time 25 minutes
Total time 3 hours 45 minutes
12 servings
Calories 188 kcal
Author Little Luna
- 10 Oreo cookies
- 1 tablespoon butter, melted
- 2 8 oz package Philadelphia cream cheese, softened
- 1/2 cup + 1 teaspoon sugar, divided
- 1/4 cup + ½ teaspoon unsweetened cocoa powder, divided
- 2 eggs
- 2-4 ounces of BAKER’S semi-sweet chocolate, depending on the size of your handle
- 3/4 cup whipping cream
- 1/2 cup mini marshmallows
-
Heat the oven to 325°F.
-
Pulse Oreos in a food processor until you have a crumb texture. Mix biscuit crumbs and butter; press on the bottom of 12 paper-lined regular-size muffin cups. Bake for 8 minutes.
-
Put the cream cheese, ½ cup of sugar, and ¼ cup of cocoa powder in a medium bowl with a blender, and stir until combined. Add eggs, 1 at a time, stirring at low speed after each egg until combined. Cover the crust with a spoon.
-
Bake for 22-25 minutes. Or until the center is almost set. Cool completely. Refrigerate for 2 hours.
-
At the same time, make the chocolate handle. Cover the baking sheet with parchment paper. Melt the semi-sweet chocolate according to the instructions on the package, then use a spoon to put it in a resealable plastic bag. Cut a small piece from one bottom corner of the bag. Squeeze the chocolate into 12 handle shapes on the prepared baking sheet. Freeze until ready to use.
-
Remove the paper liner from the cheesecake. Use a whisk in a separate medium bowl to whisk the cream and remaining sugar at high speed until soft peaks form; scoop onto the cheesecake. Sprinkle with remaining cocoa powder; marshmallows on top (we even added crushed candy canes to add flavor). Gently press the chocolate handle into the side of each cheesecake.
This article is sponsored by Philadelphia Cream Cheese. As always, all opinions are 100% of my own.