How to Make Sponge Candy – Easy Recipe!
How to Make Sponge Candy – Easy Recipe!
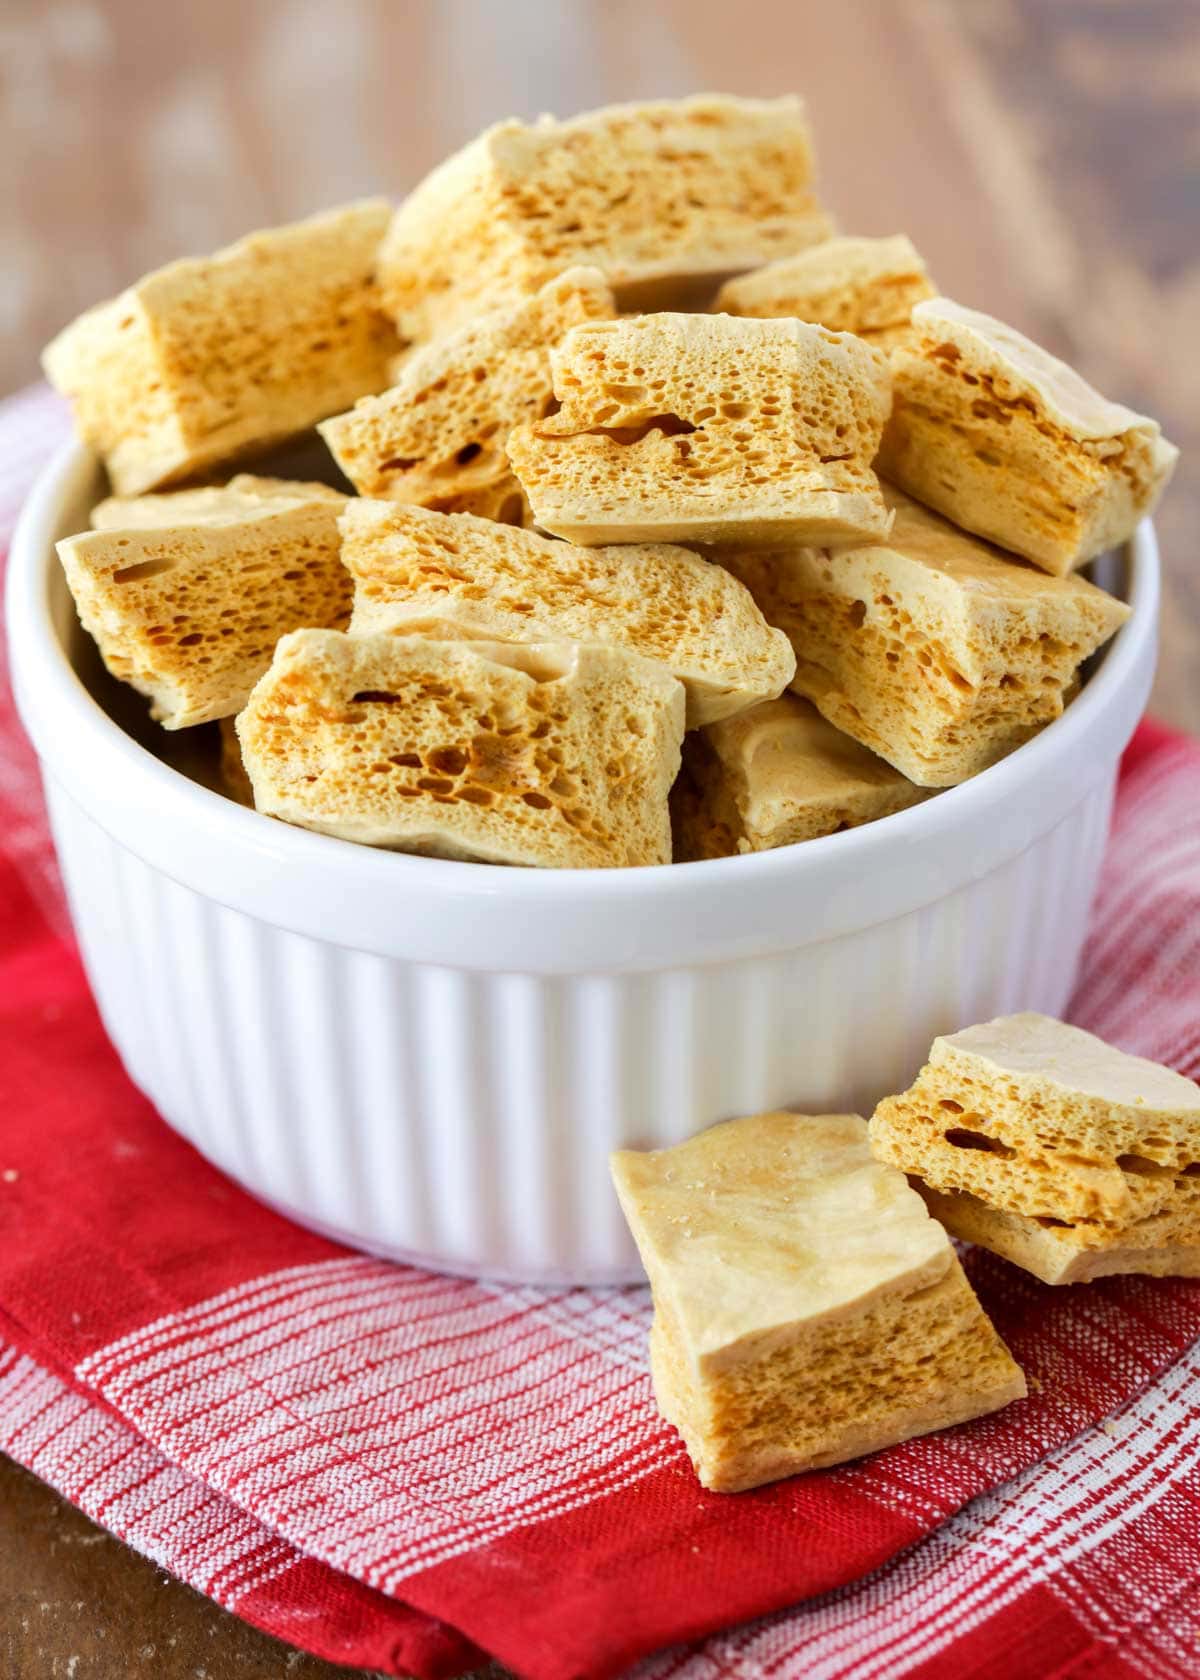
Sponge candies are crunchy, airy candies with a hint of sweetness. It’s a delicious candy that’s perfect as a gift.
Chocolate Cinnamon Bears and Caramel Candies are holiday staples in our house. This Honeycomb Sponge Candy is fast becoming part of the most popular candy list!
What is Sponge Candy?
Baking is always a science experiment, and this one is a lot of fun. Kids will love seeing this candy bubble up like lava before cooling. Once cooled, they can help you cut them into pieces with a mallet or butter knife.
The pieces will be irregular and have lots of air holes, which is why all the different names. I’ve seen it called lava candy, sea bubble candy, honeycomb candy, in our case sponge candy.
Whatever it’s called, it’s fun to make and even better to eat!
Don’t be intimidated by the use of a candy thermometer, this recipe provides step-by-step instructions for even the most novice candy maker! So start making delicious snacks!
How to Make Sponge Candy
Cook. In a heavy saucepan, combine sugar, corn syrup and vinegar. Cook over medium heat, stirring constantly, until sugar dissolves. Cook on a candy thermometer until it reaches 300° (hard crack stage – about 12 minutes). Do not overcook.
brush. Remove from heat and quickly add baking soda (it will start to bubble, but stir quickly until no more baking soda is visible).
cool. Pour onto a lightly greased parchment-lined jelly roll pan. It will be large and foamy, but will fall off as it cools. Do not press or spread the candy. When the mixture cools, break into bite-sized pieces.
Dip + Enjoy! Dip in melted chocolate; place on wax paper until chocolate is firm. Store candy in an airtight container.
Variety
- Dip each piece of candy in chocolate (a popular way to make sponge candy!).
- Sprinkle sea salt directly before the candy hardens, or sprinkle over the chocolate after it’s dipped.
- Dip in white chocolate or vanilla sugar coating.
- You can always drizzle chocolate on top if you don’t want to completely submerge it in anything.
Make sure you read these tips!
I love researching the recipes I post. Some recipes are so easy and good every time, others may take some practice. I had to make this recipe more than once to make the perfect sponge candy! Here are some tips I found that might help you:
weather and altitude
I live in Arizona so I don’t have to consider the weather or altitude when cooking and baking, nor can I test recipes in those conditions. However, I can share what others have said:
- First, wet or rainy weather can negatively affect this recipe. Moisture in the air can interfere with how the mixture rises and sets, and you may not get the signature air holes you want.
- Second, altitude. I can’t try this, but I can recommend you a website that says you should “decrease the cooking temperature in candy recipes by 2 degrees for every 1,000 feet above sea level”.
baking soda
Make sure your baking soda hasn’t expired. If you’re really careful, use a brand new box. Another little trick I saw from a 96-year-old grandmother was to sift the baking soda with a fork and then add it to the mixture to distribute it more evenly.
Once you add the baking soda, you will find that the mixture really starts to bubble. In my first batch, which surprised me, I poured the candy without mixing well. I can tell that some parts of the candy have more air bubbles than others. However, you also don’t want to overmix, because then you can mix the air bubbles together. This may take some practice.
Avoid spreading or squeezing the mixture.
I’ll admit I patted the top of one of the batches with a spatula to smooth it out. After I broke it into pieces, I could totally see that the air bubbles on top had been compressed, oops! Just pour in the mixture, don’t spread or pat it. It will flatten on its own and all the beautiful bubbles will stay intact.
Basic equipment for this recipe
Use a heavy-bottomed pan. The quality of the pot can make a big difference. A heavy-bottomed pan will distribute the heat more evenly so you don’t get hot spots of burnt candy.
candy thermometer: Sometimes you can test your candy the old-fashioned way with a bowl of cold water. However, I highly recommend using a reliable candy thermometer for this treat. Once it reaches 300 degrees, remove it from the heat and pour. Don’t let it cook too long or it will burn.
line the pan: A common comment I find is that people have a hard time getting the finished candy out of the pan. The most common suggestion is to line the pan with parchment paper and fold the excess on the sides. Then, spray the paper with cooking spray. I decided to line the jelly roll pan with parchment paper and it worked great.
How to Store Sponge Candy
shop This candy in an airtight container – it will last for weeks. Make sure it stays dry.
Do not keep it in the refrigerator or freezer, as any moisture that forms will affect the texture of the candy.
For more holiday treats, check out:
Course dessert
American food
Prep time 10 minutes
Cook Time 15 minutes
Cool for 5 minutes
Total time 30 minutes
Serving Size 12
Calories 289 kcal
by Lil’ Luna
- 1 cup sugar
- 1 cup dark corn syrup
- 1 tablespoon white vinegar
- 1 tablespoon baking soda sifted with a fork
- 1 pound milk chocolate candy coating melted
-
In a heavy saucepan, combine sugar, corn syrup and vinegar. Cook over medium heat, stirring constantly, until sugar dissolves. Cook on a candy thermometer until it reaches 300° (hard crack stage – about 12 minutes). Do not overcook.
-
Remove from heat and quickly add baking soda (it will start to bubble, but stir quickly until no more baking soda is visible).
-
Pour onto a lightly greased parchment-lined jelly roll pan. It will be large and foamy, but will fall off as it cools. Do not press or spread the candy.
-
When the mixture cools, break into bite-sized pieces.
-
Dip in melted chocolate; place on wax paper until chocolate is firm. Store candy in an airtight container.
We recommend that you test your candy thermometer by boiling water before each use; the thermometer should read 212°. Adjust recipe temperature up or down based on your test.